Your partner for astronomy
Subscribe to RSS Feed or ATOM Feed

Now available: the new CGEM II mount from Celestron

May 17 2017, Stefan Taube

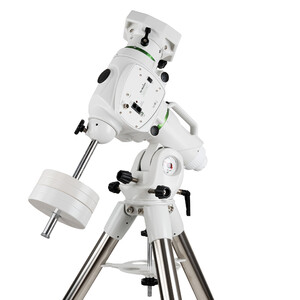
The American telescope manufacturer Celestron has revised their work horse for astrophotographers. The CGEM II is very popular, and rightly so, because when it comes to load bearing capacity it has a lot of reserves as compared to the smaller Advanced VX mount; but it is cheaper than the big CGX. In the field of equatorial GoTo mounts for mobile astrophotography the CGEM II takes a middle position.

CGEM II

The new CGEM II not only looks very trendy, but it also features a few real innovations when compared with its predecessor.

  • New powerful motor electronics with the latest firmware.
  • USB 2.0 port on the hand controller. This way you can simply connect the hand controller to a PC for software updates.
  • PPEC (Permanent Periodic Error Control) ensures precise tracking.
  • Autoguider port. Indispensable for sophisticated astrophotography!
  • Tracking beyond the meridian.
  • The mounting saddle accepts prism rails acc. to Vixen and Losmandy standard. No adapter required.
  • Improved tripod with height marks: This makes it even easier to place the tripod horizontally.

With this mount, the telescope, camera and guider may have a weight of up to 18 kg. This leaves a really big tolerance range.

We offer the CGEM II, but also as a set together with the Schmidt-Cassegrain optics with apertures ranging from 8 to 11 inch (~200 to 280 millimetres): CGEM-II telescopes.

Combined with the classic SC-telescopes this provides you with excellent astronomical equipment which will give you joy for the rest of your life! If you have extra spending money, you should consider the CGEM II with EdgeHD. This variant of the Schmidt-Cassegrain telescope already has the correction optics for the unavoidable coma error integrated, allowing you to take sharp photos right to the edge.

Whatever you will decide, with the CGEM II you can’t go wrong!

Observing the Sun with the DayStar QUARK Calcium-H

May 11 2017, Stefan Taube

The American sun filter manufacturer DayStar revolutionised sun observations with its QUARK series. For a comparatively low price you can now use a refracting telescope with a small aperture for watching the Sun in a defined spectral line – this is no more complicated than plugging an eyepiece into a diagonal mirror.

DayStar have now extended their QUARK series by a model to watch the Sun in a spectral line of the chemical element calcium. With the DayStar QUARK Calcium-H-line sun filter you can watch the sun at a wave length of 397 nanometres – or perhaps not: Not everyone is able to notice such short-wave light.

However, with a planet camera this short-wave radiation can be recorded without any problems. Corresponding tests were undertaken by our colleague Bernd Gährken:

Sonne-Calcium-H

For this photo 4 images were combined. In addition to the QUARK Calcium-H-line, an Omegon photoscope with 1.6x Barlow and a planet camera were used. The scope of delivery includes adapters for 1.25″ and 2″ focusers. The Calcium filter works without telecentrics and requires an optical path of 6.2 centimetres. With many optics the focus cannot be reached directly. We therefore recommend also ordering the reasonably priced path corrector. It can be screwed directly into the QUARK filter. In terms of cameras, we specifically recommend the Mono Guider from Touptek or the planet cameras from ZWOptical. When photographing a tight spectral range, the complete resolution of the sensor can only be utilised when using a black-and-white camera (“mono”).

Unfortunately there were no sunspots on the sun when this photo was taken. This exemplary image provided by the manufacturer shows what sunspots in the light of the Calcium-H-line look like.

Sonne-Calcium-H-Daystar

Photographic data for this image can be found on the product page, QUARK Calcium-H-line.

Observing the sun is a fascinating alternative or an additional challenge for stargazers.

Lunar photography with a smartphone: the Omegon Easypic smartphone adapter

April 27 2017, Marcus Schenk

In the past, taking a photo of the Moon required quite some effort. Take the pictures, develop the film and hope for sharp images. And then came the disappointment if the Moon appeared blurred. This became considerably easier with digital and mobile phone cameras.

In the meantime, smartphone cameras have reached an outstanding level of quality. Which is a good tool for Moon photos, provided that we can tightly mount the phone to the telescope.

Let’s have a look to see how everyone can take a photo of the Moon through a telescope.

The Moon – shot with an Easypic adapter, an Omegon 8″ Dobson with Redline eyepiece and an iPhone.

Der Mond - aufgenommen mit einem Easypic Adapter, einem Omegon 8" Dobson und einem iPhone.

The difference to other adapters

The Easypic universal smartphone adapter follows a different route to his competitors. Most adapters have a clip that closes around a 1.25 inch eyepiece. The mobile phone is then separately held by a clamp and needs to be correctly positioned above the eyepiece. In itself this is a quite good system but needs quite a lot of experience on the part of the photographer. And in the end, everything must sit tightly in place.

Now the night is not always the right place for patience. And it is pitch black!

Is there no easier way? Yes, sure there is! With self-centring.

Here is how to prepare the adapter

With the Moon in the sky, you direct your telescope to Earth’s satellite. It is already nicely visible through the eyepiece. Now your smartphone and the Easypic adapter are going to play their role.

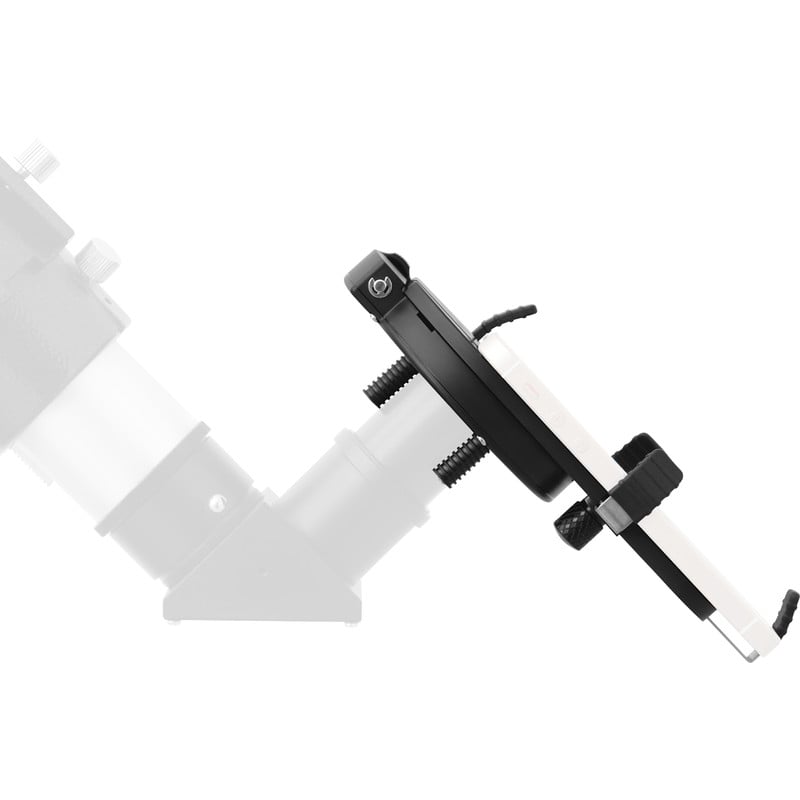
On the back of the adapter, loosen the small screw for the holding clamps. Pull the holding clamps fully to the outside. Then place your mobile phone with its camera lens directly over the central hole. Slide the holding clamps back against your phone and tighten the screw again. Check that the clamps fit tightly so that your mobile will not come loose.

Here is how to connect the adapter to the eyepiece

Now to the easy part! Hold the adapter with the smartphone to the eyepiece, making sure it has direct contact. Then turn the big screw on the side. This allows the movement of three bolts, which accurately clamp around the eyepiece at the same time. This way the adapter centres and fastens automatically around your eyepiece. The camera lens of the smartphone is perfectly aligned with the middle of the eyepiece.

For you this self-centring means: more focus on your object and less worry with technical details.

All done.

So sieht es aus: Das Smartphone am Teleskop und der Mond im Zentrum.

The photoshoot: The Moon in your smartphone

If your camera app has been switched on, you should now see the Moon in your display. Correct the focus once again and everything is ready for taking the photo.

These steps are necessary:
•    Switch off the flash
•    Activate the timer
•    Adapt the exposure time, if necessary and possible

Now press the trigger as usual and take a photo. This image of the Moon was taken with an Easypic universal smartphone adapter and an Omegon 8 inch Dobson telescope.

Using neutral density filters to reduce brightness

In most cases adjusting the correct exposure time is enough for successful Moon images. However, planets like Venus or Jupiter very often appear too bright in an image. They are over-exposed. The planet discs appear burned out. The solution: neutral density filters and variable polarising filters. This is our trick to be able to show the details of the planets.

Conclusion:

A smartphone in combination with an Easypic universal smartphone adapter allows you to take quick photos of the Moon and planets. You don’t have to be an expert: even connecting to the eyepiece is child’s play. All you need to do is position the adapter correctly. The smartphone takes photos of the Moon with outstanding sharpness. A fact that all of us could only dream about a few years ago.

Explore Scientific Twilight AZ – the uncomplicated mount!

March 27 2017, Stefan Taube

The equatorial mount with GoTo functionality is not necessarily a must-have.  Sometimes you just want to have a quick look at the moon or the planets, search for a comet or observe large areas of the sky with a suitable refractor. In this case, an uncomplicated and quickly available azimuthal mount is fits the bill.

The new Twilight I AZ from Explore Scientific is just such a mount. It accommodates telescopes with a weight of up to eight kilograms – which is quite strong for a mount of this class.

ES-Twilight-AZ

Moving to the desired objects is a simple task: With just one lever each you can loosen the clamps of the elevation and the azimuth axis and quickly move the telescope. Once you have retightened the clamps, you use the two flexible shafts and the precision worm gear for fine tuning and tracking.

The mounting saddle accommodates telescopes with a prism rail, compatible with the very popular Vixen standard. With the enclosed Allen key, the mount arm can be adjusted to optimize the viewing height of your optical system and to make sure that the telescope will not hit the tripod leg. Speaking of tripods: the Twilight I AZ comes with a steel tripod with extendible legs and an eyepiece tray.

The mount Twilight I AZ is currently available for a price of 279 Euro – an excellent price for a mount of this quality!

DeepSky-Set: Cooled camera ASI 1600 with filter and filter wheel from ZWO

March 13 2017, Stefan Taube

ASI 1600 MM series cameras from ZWOptical have really found their place in astrophotography. With its small pixels, the highly sensitive CMOS sensor offers high resolution, and this even in connection with a relatively big sensor diameter.

We now offer the cooled black and white camera of the ASI 1600 series in a set with a motorized filter wheel and suitable filters: ASI 1600 MMC DeepSky-Imaging-Set for a price of 2,019 Euro. You save 29 Euro when compared with individual prices!

ASI-1600-MMC-Mono-DeepSky-Imaging-Set

A camera with active cooling is optimal for taking photos of nebulae and galaxies, because the cooling reduces sensor noise and thus enables long exposure times. This enables you to even take photos of very faint objects in the sky.

Even though the cooled ASI 1600 is available as colour or black and white camera, only the black and white camera offers the full resolution of the sensor. Ambitious photographers therefore favour this variant. In order to show the colour of the celestial object you just simply take photos through three colour and one luminance filters – the latter to increase brightness. The computer then uses these four images to produce a colour image (L-RGB method).

The filters are placed into a filter wheel, so that the camera does not have to be removed and realigned again for each filter change. The filter change simply takes place by turning the wheel. The filter wheel in the Set with the ASI 1600 is electrically powered and controlled via the camera, meaning you do not need an additional cable connecting to your computer. You simply use the camera control to change from one filter to the next, and this, above all, without having to touch anything.

The four filters in the DeepSky-Imaging-Set were specially developed for the ASI 1600. The colour weighting has been optimized for its sensor, which in this case is a high-quality interferential filter. Since the filters are parfocal to one another, the focus position does not change when changing the filter. Besides the three filters for the red, green and blue channel, the set also contains an UV/IR band-rejection filter for luminance.

Just as the graph concerning the filter transparency (transmission) of the set indicates, the filters block out the disturbing light of many street lamps, but are highly sensitive in the red range of the H-Alpha and SII-line. The transmission rate is greater than 92%.

Transmission

With the ASI 1600 MMC DeepSky-Imaging-Set you receive a high-quality, yet reasonable, camera system with almost unlimited possibilities!


Infographic: Highlights in the Spring Night Sky from March to May

March 2 2017, Marcus Schenk

As the temperatures outside become milder, many stargazers make their way outside.  In the Spring, the night sky shows us a very different side of itself.  What is there to observe?  What is worth the time and effort?

Our astronomy highlights infographic for Spring 2017 can show you at a glance, what to keep an eye out for during the next three months, from March to May.

EN - u2g-infographic-astrohighlights-spring

March

1 March – The Moon’s Meeting with Mars, Uranus and Venus 

During dusk, the crescent Moon will rise, illuminated at 12% and waxing.  Three days prior was the new Moon and the crescent offers a vivid glimpse of the Mare Crisium.  Still there is more to be seen here in a trio of planets – Mars, Uranus and Venus.

4 March – Moon Occults the Hyaden Cluster

Occultations of celestial objects by the Moon are always interesting and are all the more fascinating when the Moon is not fully illuminated, thereby occulting the object with its non-illuminated side.  On the 4th of March the Moon will travel across the open star cluster of the Hyades and thereby obscuring the 3.6 mag bright star 54 Tau. For European observers, the star will disappear behind the non-illuminated side of the Moon just before 9 PM GMT and reappear at the other side just before 11 PM GMT.

10 March – A Lunar Meeting with Regulus

In the evening of the 10th of March, the almost full Moon will rise in the East, as the sky darkens.  Just above it, the constellation Leo and its brightest star Regulus.  At the beginning of the evening, the two will be about 1.6° apart.  However, shortly before midnight our satellite will move within 1° of Regulus.  From here, you will be able to observe how the Moon slowly travels across the night sky.

14 March – A Lunar Meeting with Jupiter and Spica

Quite a sight indeed: on the 14th of March, we will see the Moon in close proximity to Jupiter and Spica, the brightest star of Virgo.

19 March – Venus and Mercury

The only good chance to view Mercury during the evening this year, the smallest planet will be visible from now until the 10th of April!  As of the 19th of March, we will be able to discover the Sun’s closest planet extremely close to the western horizon.  Need help finding it? Just search out Venus and approximately a hand’s width away, you will find Mercury.

26 March – Extremely Thin Venus Crescent (for the Professionals)

Venus reveals itself in her perfect form, subtle and crescent-shaped, the planet will appear just above the horizon, and only 1% illuminated.  The most fascinating part is that this event will take place during the day.  Warning: the Sun will appear very close to Venus, so avoid looking directly into the Sun.  This type of observation is best left to the experienced astronomer.

29 March – Mercury at Dusk

Mercury will be approaching its easterly elongation, occurring on the 1st of April, meaning the planet will descent in the dusk following the Sun and will appear as a half-illuminated disk.  Mercury will now set later, than on the 19th of February, and be an easy object to identify in the night sky.  The sight along with a crescent Moon at 3.6% illumination will provide a great opportunity to capture the essence and atmosphere of the evening!

April

1 April – Minor Planet Vesta

In January, the minor planet Vest stood at opposition and was visible throughout the night.  The class 7.6 planet will be easily visible in the constellation Gemini, almost half way between 69 Gem and 77 Gem.

7 April – Jupiter in Opposition

On the 6th of April, the gas giant Jupiter will be in opposition to the Sun.  Rising just at dusk, the planet will be visible throughout the night.  Photo tip: Photograph Jupiter this year, as the gas giant will be roughly 30° above the horizon, just below the celestial equator, and will not reach a higher position for the next few years.

10 – 11 April – A Lunar Meeting with Jupiter

The almost full Moon will approach Jupiter, at 1.1°, during the night of the 10th and 11th of April.

14 April – Comet 41P/Tuttle

The comet 41P/Tuttle-Giacobini-Kresak will approach the Earth, and be easy to view through a telescope.  During this year’s pass, a respectable increase in brightness is predicted.  According to the Minor Planet Center, the comet will increase to a 6.7 mag bright object from the beginning to the middle of April.  Moreover, it will appear high in the sky as a circumpolar object and travel from mid-April through the constellation Draco, until it reaches Hercules by month’s end.  The Moon provides a helping hand by being in its darker phase.

21 April – Lyrid Meteor Shower

The Lyrid meteor shower will peak on the 21st with 10 to 20 meteors per hour.  While the optimal observation time is between 10 PM and 4 AM, the Moon will cause little disturbance.  The radiant, so the origination of the shower, lies within the constellation Lyra.

28 April – The Moon Occults Aldebaran

For European observers, a thin Moon cicle will occult the star Aldebaran in the constellation Taurus at 8 PM.  On the 28th, the occultation will occur during sundown.  Approximately 50 minutes later, around 9 PM, Aldebaran will appear on the other side of the Moon.

30 April – Venus in Full Splendor

The morning star Venus will shine bright in the sky once again.  With a brilliance of -4.8 mag, our second planet will appear just before sunrise.  The Venusian cicle will then be illuminated at 26%.

Mai

6 May – Golden Handle on the Moon

A golden handle on the Moon?  You can find it as a matter of fact.  A ring of light will appear on the dark area of the Moon’s surface.  It always appears, when the waxing Moon is illuminated at 83% (around 4 PM Central European Time, 10 EST in the USA).  Within the Mare Imbrium, the plain Sinus Iridum will connect.  This plain is encircled by Montes Jura range.  While the valley between remains in darkness, the rising Sun will illuminate the peaks of the mountain range, the spectacle of the “golden handle”.  Another way to put it: Alpenglow on the Moon!

7 May – A(nother) Lunar Meeting with Jupiter

During the night of the 7th into the 8th of May, the Moon will once again approach Jupiter, reaching a separation of only 1°.

11 – 12 May – Shadow Games on Jupiter

Tonight, we will be sitting in the premium seats.  Before us on stage: Jupiter and its moons.  In a short on the night of the 1tth to the 12th, we will witness the moons Europa and Io leave their shadows on the gas giant.

First, Europa will travel across the planet’s disk around midnight (central European time).  At around 1:40 AM, the moon’s shadow will transit across the planet.  Then at 3:13 AM, Io will dance in front of Jupiter.  Its shadow will then follow shortly before 4 AM (CET).  We will then see two shadows on the planet, one on each side of the gas giant.

Ensure that you have a good view of the horizon during this event, since Jupiter will be sitting just above the horizon around 4 AM.

12 May – The Great Red Spot on Jupiter

This evening, the great red spot of Jupiter will be easily observable.  Around 9:40 PM, the spot will appear from behind the planet and wander over a four-hour period over the planet’s disk.

14 May – A Lunar Meeting with Saturn

Four days after the full Moon, a lunar meeting with Saturn will take place, with a separation of 1.6°.

20 May – Western Lunar Libration

For astrophotographers, this can be a very interesting project – capturing the libration of the Moon.  The Moon will find itself in its western libration.  A strong eastern libration will take place on the 31st of May, during which you see more of the Moon.  Capturing it in a photograph will surely be a fine experience.

22 May – A Lunar Meeting with Venus

Shortly before sunrise, we will witness a beautiful constellation of Venus and the Moon at a separation of 6°.  The Moon will show itself as a cicle, illuminated at 19%, with a new Moon three days later.

25 May – Moon in Close Proximity to Earth

The new Moon will be at a distance of 358,000 km (222,500 miles) to Earth, making it the closest distance of the year.

31 May – A Lunar Meeting with Regulus

Today, the Moon will be at 1.5° of separation from the star Regulus.


With the following code, you can embed our inforgraphic in your blog:

Available as JPG and PDF.

Enjoy stargazing and clear skies!

Celestron CGX: a mount close to the limits of perfection

February 27 2017, Stefan Taube

The Celestron brand once again has set the standard for hobby astronomers: The new CGX-mount combines the current technical standard with a well thought out product design – and all for an reasonable price.

CGX-Montierung

Some special features of the CGX-mount:

  • Toothed belt drive and spring pressure mechanism: The belt drive minimises the gear play when changing the direction of movement (“backlash”). The spring pressure mechanism ensures uniform contact pressure between the worm gear and shaft, reducing friction and optimising the operation of the gear – also evident by the reduced noise level.
  • Optical encoders register the position of the mount. The motors can then be stopped before the mechanical slew limit is reached and approach their home position. The mount is able to track objects up to 20° above the meridian.
  • Internal wiring: Only the power supply cable and the cable to the hand control box are exposed. However, the sockets for these exposed cables are arranged in such a way that they do not need to move with the mount.

Der neu konzipierte Antrieb der CGX-Montierung.

  • Large handles: Transport handles ensure easy transport, but all clamping levers are also designed for operation with gloves.
  • Compact design: The saddle plate position near the right ascension axis gives the mount very favourable oscillation characteristics. The declination motor serves as a counterweight.
  • Latest variant of the Nexstar+ control with internal clock to save the last settings and USB-port for simple software update.

Further information on our CGX product page.

Die neue CGX-Montierung mit dem EdgeHD 925 Teleskop.

The CGX-mount is available on its own or as a set with the well-established Schmidt-Cassegrain optics from Celestron. You can find all variants under the link CGX-Telescopes.For ambitious astrophotographers we highly recommend the CGX 925 in its Edge HD version. The most reasonably priced and recommended combination of SC-optics and mount for beginners is the CGX 800.

However, due to the dual Vixen/Losmandy saddle plate you can easily combine almost any other optic from other manufacturers with the CGX-mount.

Now available: the EQ6-R mount from Skywatcher!

February 20 2017, Stefan Taube

The new EQ6-R Pro SynScan GoTo mount from Skywatcher is now available for ordering. With its price of EUR 1,599 it is just slightly more expensive than its predecessor. We offer you the EQ6-R even cheaper than the price recommended by the manufacturer: You save EUR 100!

The EQ6-R mount is the further development of one of the most popular astronomical mounts. The classic EQ-6is an equatorial mount with computer control (GoTo). It has a high load capacity, but is still portable. And this all for a fair price. No wonder that the EQ6 has really found its way into the heart of the stargazer community.

“Only those who change remain true to themselves.” (Wolf Biermann)

The new EQ6-R does not do everything differently, but many things better:EQ6-R-Pro-SynScan-GoTo

  • Ergonomic design with bigger twist handles for polar elevation setting and a better polar elevation display, convenient handle for transport, mounting saddle for Vixen or Losmandy standard prism rails.
  • Latest version of the SynScan hand controller, permanent PEC correction and camera shutter control.
  • And best of it all: a toothed belt drive! With this new drive system there is no effect known as backlash, i.e. no gear play when changing direction. The mount runs much quieter, with higher torque. All this has a positive effect on autoguiding.

With this new version Skywatcher gives its classic mount a facelift. This way the new EQ6-R will be a standard in hobby astronomy for years to come: the EQ6 just keeps on running…

Now available for a special price: Skywatcher 120mm EvoStar on EQ-3 mount

February 13 2017, Stefan Taube

For years this has been one of the most popular beginners telescopes: the AC 120/1000 EvoStar EQ-3 from Skywatcher. As of today, you can buy this telescope for a price of only EUR 489 instead of the previous EUR 599. You save EUR 110!

A tried-and-tested beginners telescope:

One reason for the popularity of this telescope surely is its classic form. This slim refracting telescope with a focal length of 1000 mm perfectly meets the idea you might have of a telescope. But it does not only look elegant; its power or capacity is also something worth mentioning. With its aperture of 120 mm this achromatic refractor already is one of the bigger telescopes of this design variant. With an aperture ratio of f/8.3 the colour errors have been corrected quite well. As a refractor it offers a particularly high contrast, which has a positive effect when looking at planets. Moreover, with the aperture of 120 mm numerous DeepSky objects, like the Ring Nebula and the far away Globular Cluster M13, are also visible.

EvoStarA solid base that can be retrofitted with motors:

The mount is a further development of the EQ-3. It provides a solid base for medium size optics and is most suitable for taking a stroll across the night sky.

If the equatorial mount is aligned with the North Star before starting a stargazing session, all that is left to do is to track one single axis – the right ascension axis, also referred to as hour axis – to keep the celestial object visible within the eyepiece. On telescopes with basic equipment this tracking is done by hand. However, you can, at any time, retrofit a battery-powered motor for the right ascension axis. RA drive motor for EQ-3-2 mounts.

If you would like to have both axes of the mount motorised, you should choose the EQ-3-2 motor set RA and DEC.

With such a motorised tracking system you can use this telescope to get started with astrophotography. The new EQ-3-2 motor set RA and DEC with ST4 even allows you to connect an autoguider – an advanced piece of technology in astrophotography.

The extremely robust and well-established telescope AC 120/1000 EvoStar EQ-3 can also be adapted to meet your requirements – and this even at a later date, after you have become familiar with the basics.

The portable telescope comes with complete basic equipment, which allows you to start immediately. The equipment includes 2 eyepieces and a relatively big finder scope with an aperture of 50 mm. Just unpack it, take it outside into your garden and start!

This offer remains valid as long as stock lasts – buy now!


Now available: Omegon Autoguiding-Set with 15% price advantage

February 6 2017, Marcus Schenk

Simply useful for astrophotography: a guidescope and an autoguider, with which you can control your long exposure photographs and ensure perfect and dot-shaped tracked shots.
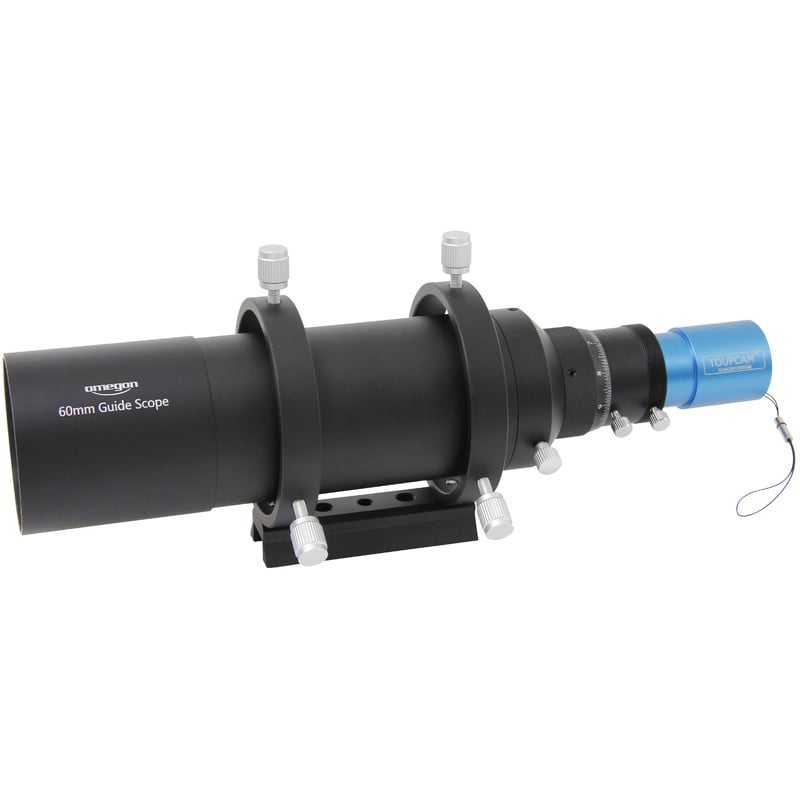
Omegon now offers a mini guidescope with a 50 mm or 60 mm diameter. With the Touptek Autoguider GCMOS01200KMB Mono the whole system becomes an astrophoto control base.


Even more economical in a set

You can also buy the mini guidescope in a set with the Touptek guider.
Your advantage: buying the set you save up 15% compared with the individual products:
1. Omegon camera Easy Autoguiding-Set50
2. Omegon camera Easy Autoguiding-Set60


Why these guidescopes are so convenient

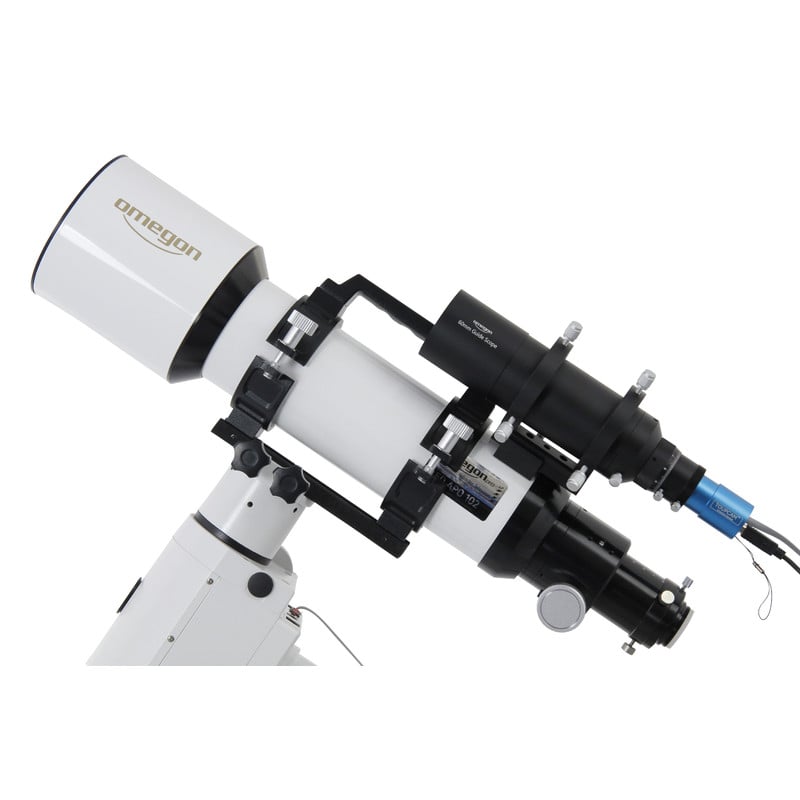
Until recently, photographers used long refractors mounted parallel to the main telescope, which require their own tube clamps, are impractical and, all in all, very heavy. Used on a stationary telescope, there is no problem. But what if you want your telescope to be portable? With the new mini guidescopes, it is as simple never before. Simply mount the guidescope to your existing finderbase, connect the camera – and you are ready to go. Plus, it is not much heavier than a common finderscope. We think this is really convenient! This way you can even use smaller telescopes for taking photos of DeepSky objects.

What are your astronomical plans for 2017? To take your best astrophoto? With our new technology this dream can easily become a reality.